Mastering the Art of Mixing Textures with Tiles for Stunning Spaces
Written by: Halima Bapu
Introduction to Tile Design and Texture
Mixing textures with tiles can elevate any space, creating a unique and stunning visual effect. Texture is the secret ingredient that adds depth, warmth, and tactile appeal, especially when you thoughtfully mix different textures, tile colours, and tile patterns to create a multi-dimensional, visually engaging space. Whether using natural stone tiles, glass tiles, ceramic tiles, or wood-effect tiles, layering various textures creates dimension and luxury. Understanding tile sizes, tile finishes, and tile combinations is essential for creating a cohesive look that suits the room’s purpose, size, and style. A well-designed tile layout can create a natural flow and add visual interest to the space, balancing aesthetic appeal with functionality.
Why Texture Matters in Interior Design
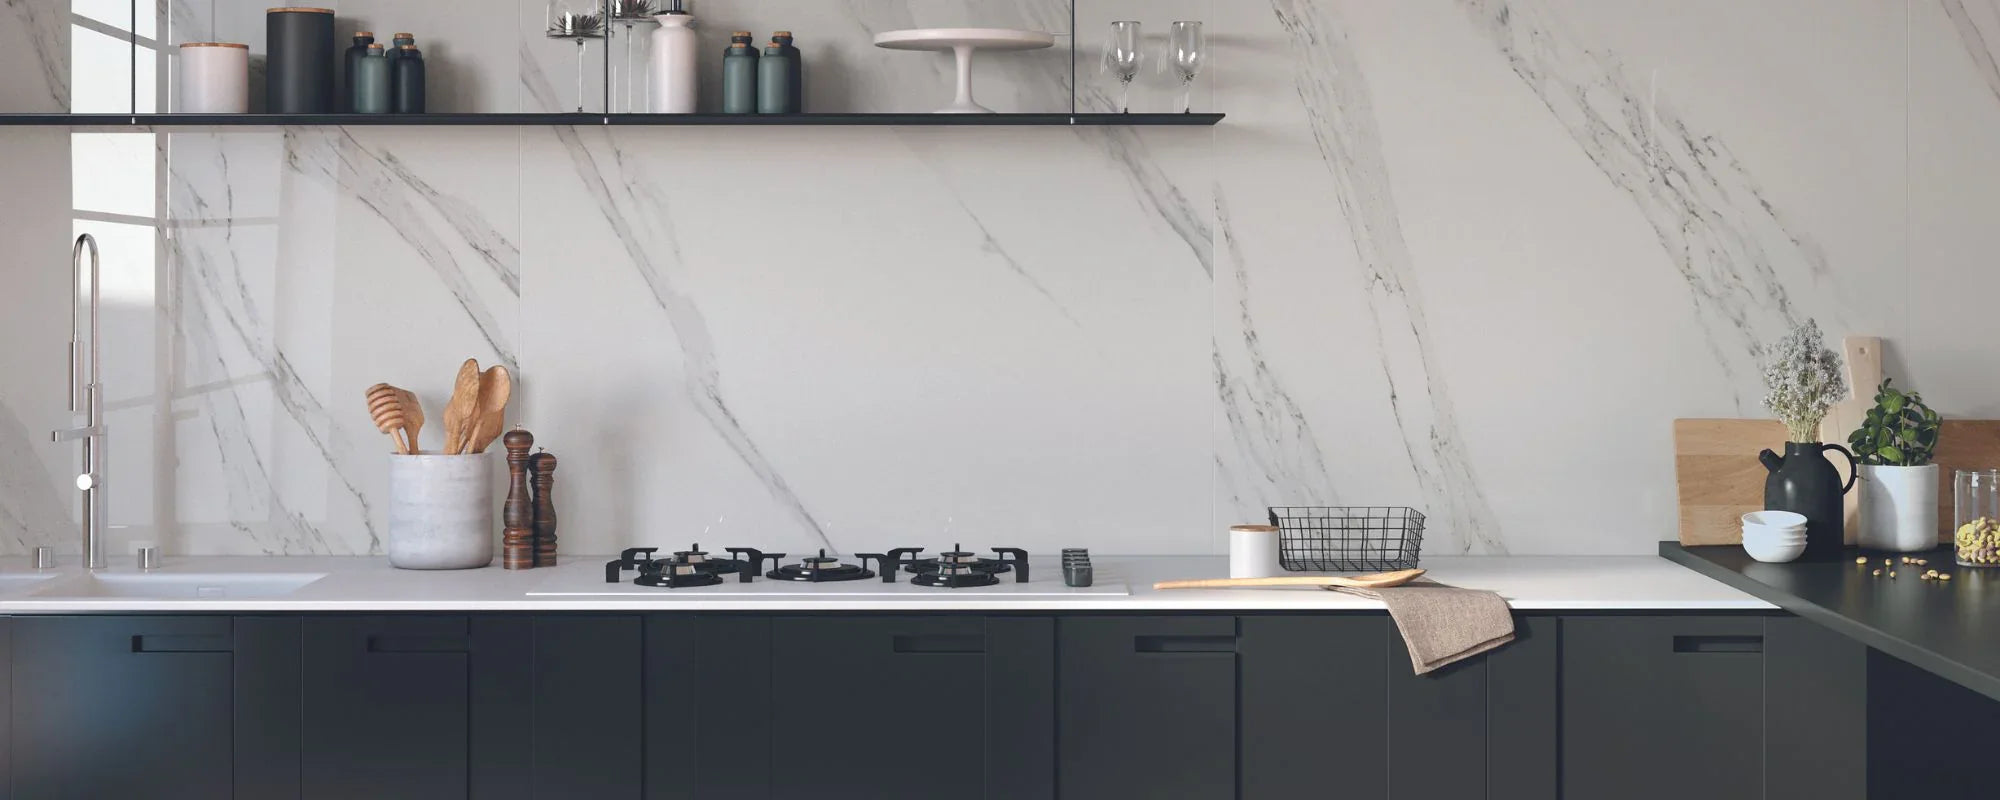
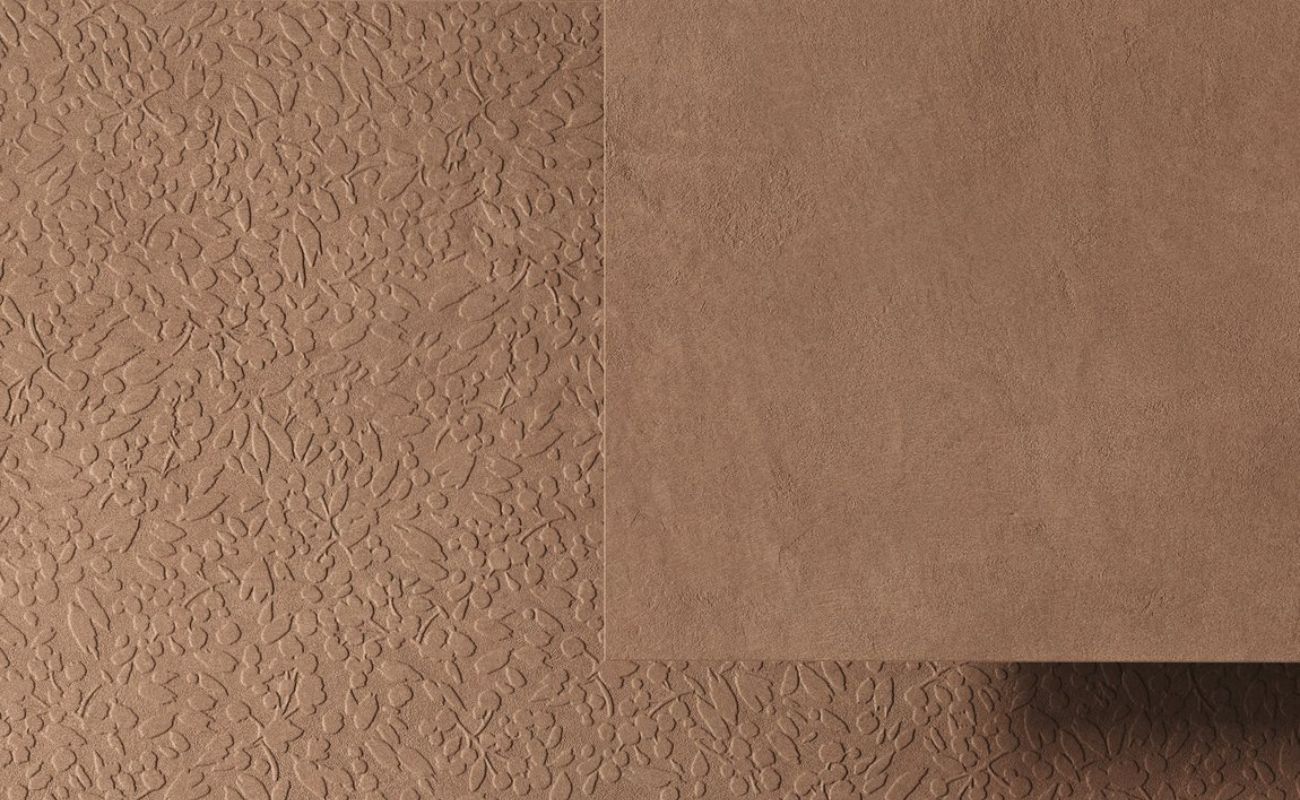
Texture is more than just how a surface feels, it’s about how it interacts with light, space, and surrounding materials. Glossy, smooth surfaces reflect light, giving rooms an airy, polished feel, while matte and textured finishes absorb light for a softer, grounded atmosphere. Mixing glossy and matte finishes, along with smooth and textured tiles, adds sophistication and depth by introducing visual interest and contrast, even within a neutral tones palette. This balance keeps your space from feeling flat and adds a sense of quiet luxury, a timeless, tactile, and effortlessly elegant finish. Incorporating textured tiles alongside neutral tiles enhances the room’s character without overwhelming the overall design. Textured tiles can also provide slip resistance, which is especially important in areas prone to moisture.
Choosing the Right Tile Materials
Selecting the ideal tile materials is a foundational step in achieving both a professional finish and lasting durability for your space. With an extensive range of options available, from natural stone tiles to sleek glass tiles, it’s important to weigh factors such as water resistance, maintenance needs, and overall aesthetic appeal. For high-moisture areas like the bathroom floor, natural stone tiles are a standout choice, offering unique textures and excellent water resistance. Glass tiles, on the other hand, can add a luminous touch and are easy to clean, making them perfect for accent walls or splashbacks. When planning your project, consider how the tiles will be used, high-traffic floors may require more durable materials, while feature walls allow for more decorative options. Don’t forget to match your tile adhesive to the chosen material and environment to ensure a secure bond during the laying tiles process. By thoughtfully selecting your tiles and adhesive, you’ll create a space that’s not only beautiful but also built to last.
Preparing the Subfloor
Before you lay floor tiles, ensure the subfloor is level, clean, and dry to prevent air pockets and ensure a strong bond with the tile adhesive. Concrete floors require special preparation, including applying a primer to create a stable surface. Check for damage or unevenness and repair as needed. Use a spirit level to confirm the subfloor is even, and apply a self-levelling compound if necessary, ensuring a professional finish. Proper subfloor preparation is crucial for the durability and longevity of tile installations, especially in high-traffic areas or wet rooms.
Laying Floor Tiles
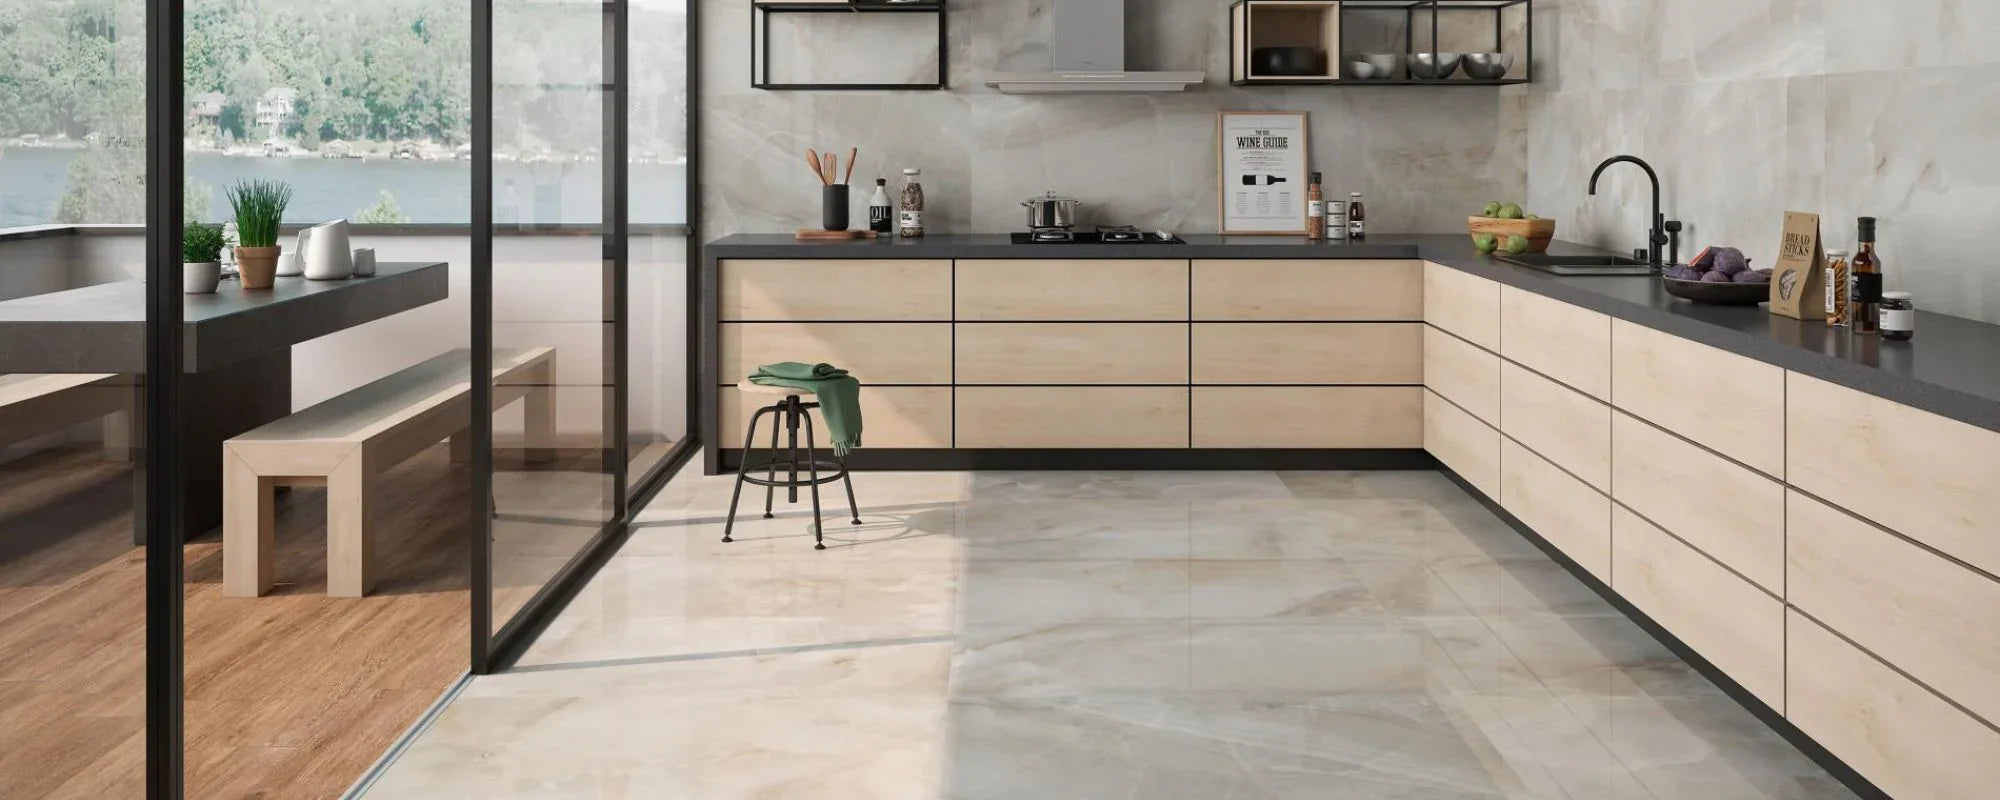
When you lay tiles, start from the centre point of the room, using a string line to guide the layout and ensure straight lines. Use tile spacers to maintain even gaps between tiles and prevent excess grout from accumulating. Apply tile adhesive with a notched trowel held at a 45-degree angle to create consistent ridges. Lay tiles firmly into the adhesive with a twisting motion to ensure full contact and avoid air bubbles. Consider using larger tiles or large format tiles to create a sense of spaciousness, especially on bathroom floors or open areas. Incorporating edge tiles can provide a neat, finished look around borders and transitions.
When choosing materials for the bathroom floor, prioritise options that offer water resistance, slip resistance, and durability to ensure safety and long-lasting performance. Natural stone tiles and textured tiles are excellent choices for bathroom floors due to their slip-resistant properties and aesthetic appeal.
Cutting and Fitting Tiles
Use a wet saw or tile nippers to cut tiles safely, wearing protective gear. When cutting, consider tile patterns and layout to minimise waste and maintain a cohesive look. Cut tiles can be used to create decorative borders or accent tiles, adding visual interest. Pay attention to edges and corners for a clean, professional finish. Proper fitting around obstacles ensures a seamless appearance, enhancing the overall tile design.
Bathroom Tile Considerations
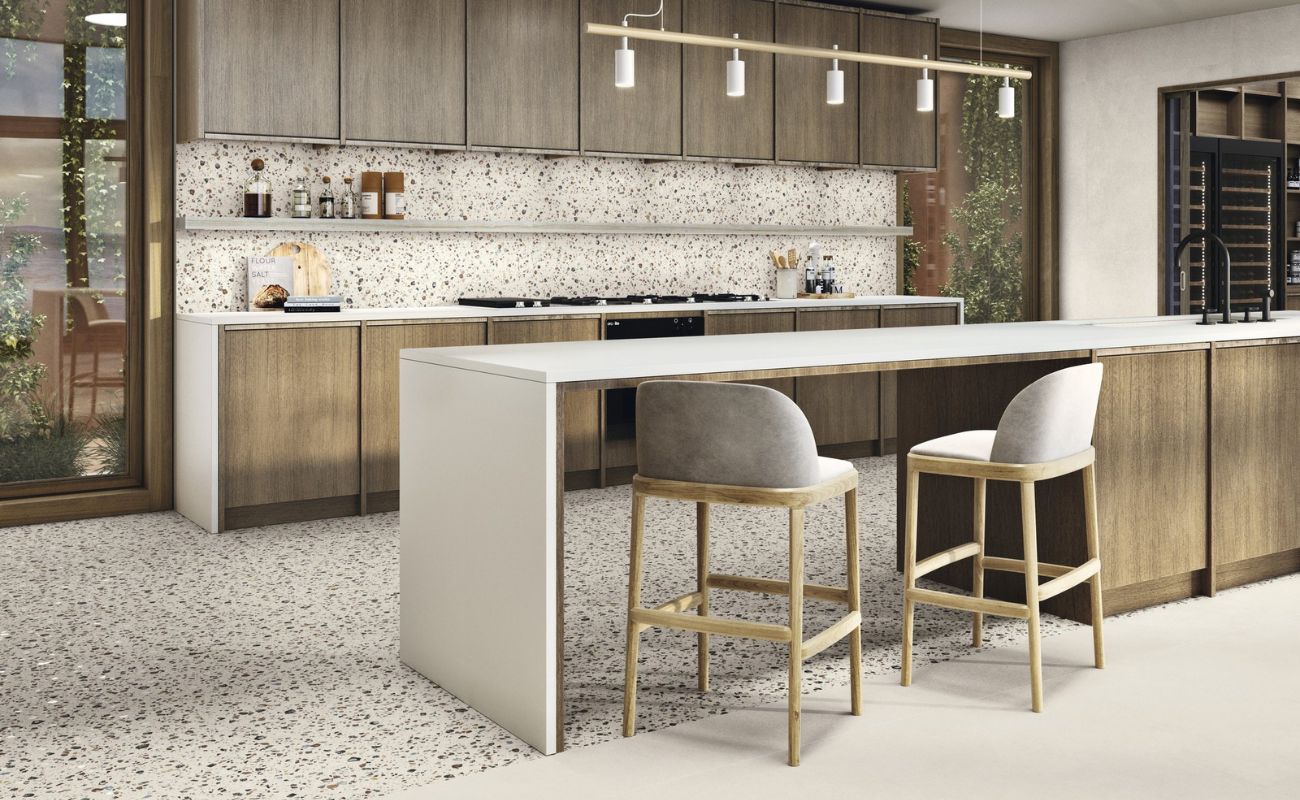
Bathroom tiles require water resistance and slip resistance for safety and durability. Use tile adhesive designed for wet areas and apply a waterproof membrane to the subfloor if necessary. Choosing between matte and glossy finishes for bathroom tiles is a functional choice, matte finishes offer slip resistance in wet areas, while glossy finishes provide aesthetic appeal. Mixing textures with tiles in bathrooms can include combining neutral tiles with accent tiles or mixing smooth and textured tiles for a dynamic look. Larger tiles on bathroom floors can make small spaces feel bigger, while smaller tiles or mosaic tiles work well for intricate details or backsplashes. Incorporating edge tiles around niches or shower areas adds a polished, professional finish.
Mixing and Matching Tile Colours and Textures
Mixing tiles, combining different tile patterns, textures, and colours, creates a unique and stunning visual effect. Using complementary colours is essential for achieving visual harmony in tile design. Stick to a cohesive colour palette, focusing on complementary tones to achieve harmony and balance. Don’t be afraid to experiment with different colours to create a personalised and visually appealing look. The 60-30-10 rule is a helpful guideline: use a dominant tile pattern or colour (60%), a secondary pattern (30%), and accent tiles (10%) to create visual interest without overwhelming the space. Neutral tones like beige, grey, and off-white provide versatile backgrounds for mixing different tile finishes. Pair glossy tiles with matte or textured floor tiles to create contrast and depth.
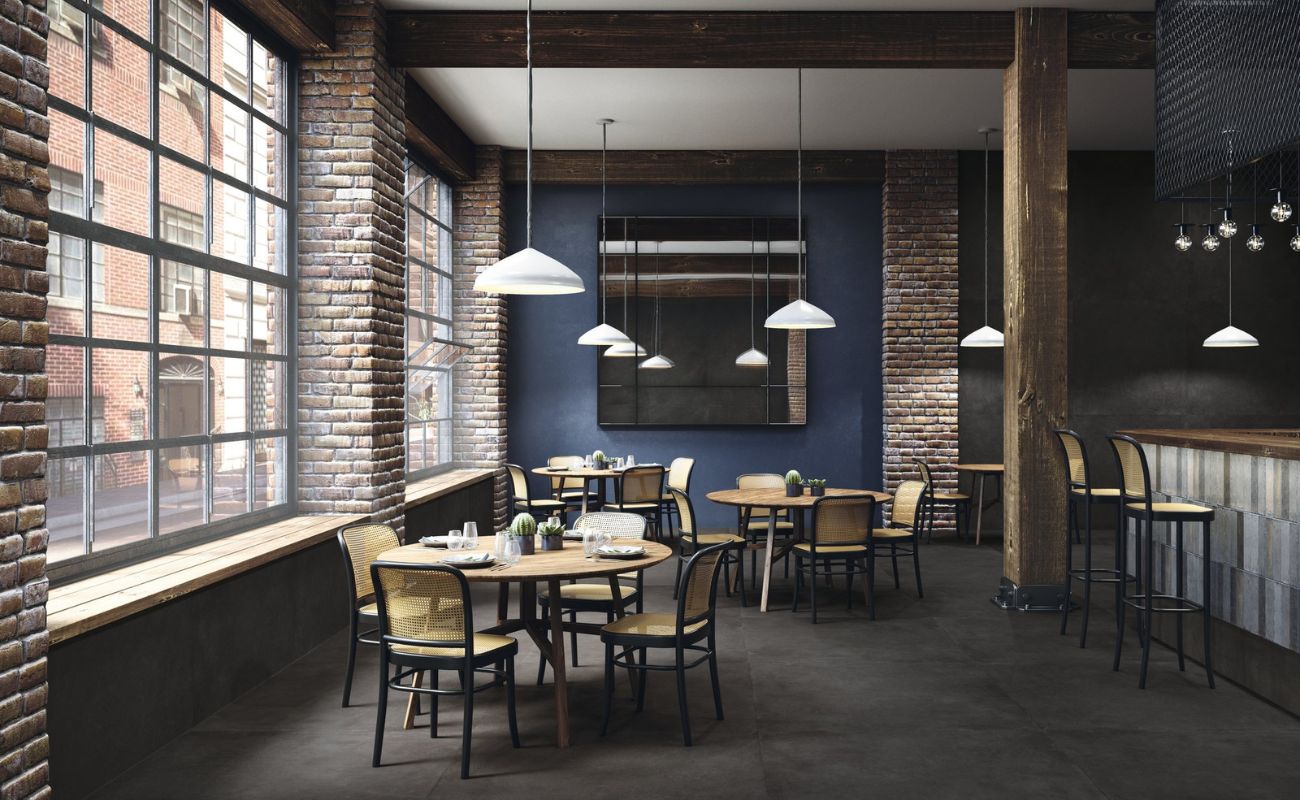
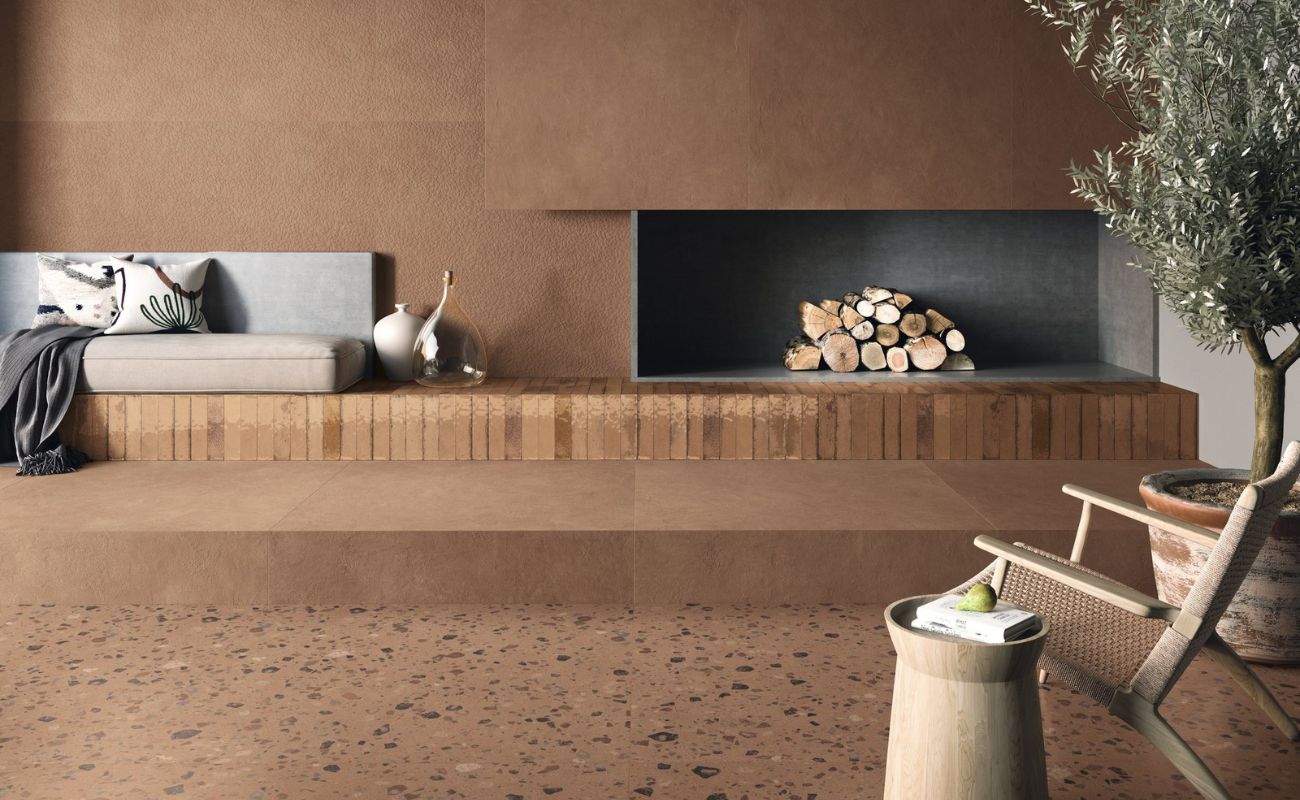
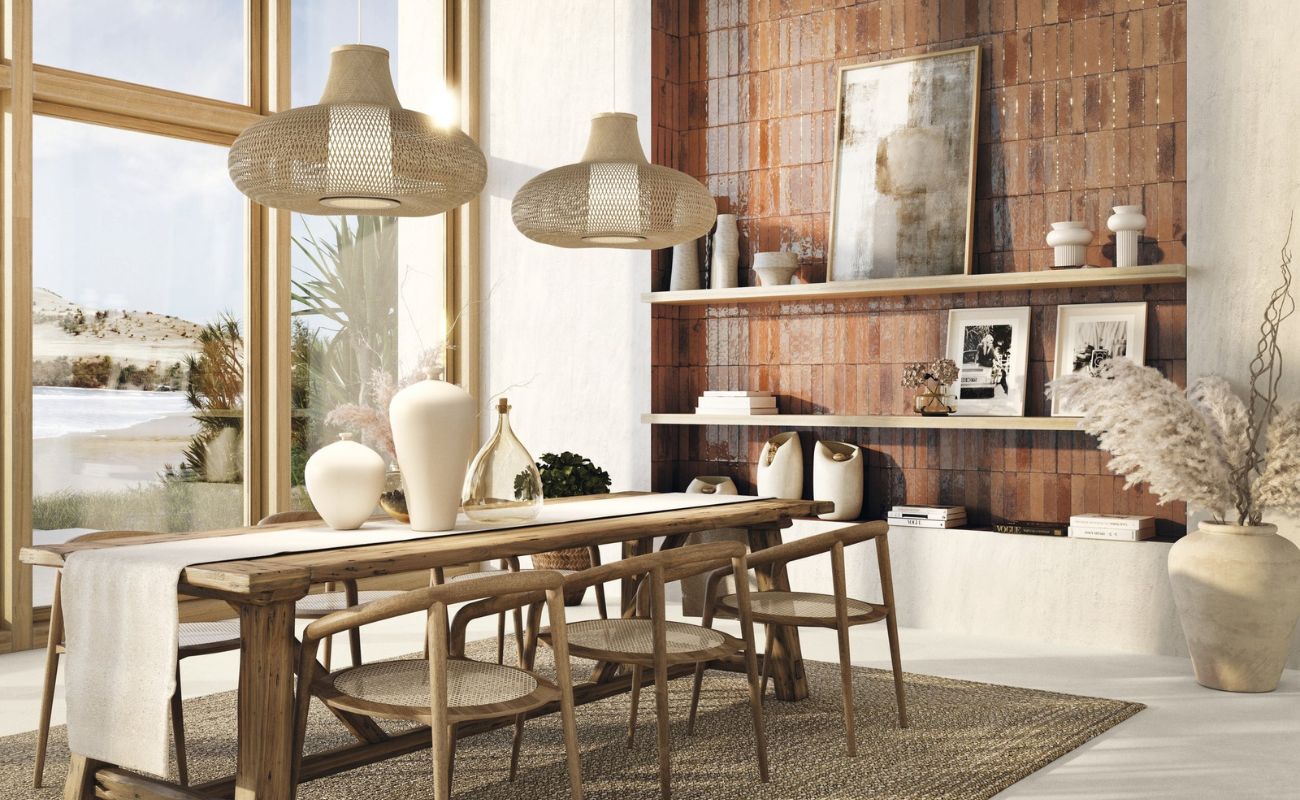
Creating a Focal Point with Texture
A focal point, such as a feature wall or accent tile, adds drama and visual interest. Use bold or bright tile colours or textured tiles to create striking feature walls. Balance these with neutral tiles on surrounding walls to maintain cohesion. For example, a 3D textured tile behind a mirror or above a freestanding bath can add architectural interest without overwhelming the room. Consider using LED strip lighting or wall washers to highlight texture and create depth. Incorporating backsplash areas with contrasting tile finishes can further enhance the visual appeal and protect walls from moisture.
Tile Combinations and Patterns
Mixing different tile patterns, such as herringbone, chevron, or mosaic, can add movement and energy to a space. Combining smooth and textured tiles enhances visual appeal. Use different tile sizes thoughtfully, large format tiles create seamless surfaces, while smaller tiles add detail and interest. Avoid using too many small-scale textures in one area to prevent a busy look. When using small tiles, consider grout colour carefully: contrasting grout highlights shapes and patterns, while matching grout creates a smooth, continuous surface. Incorporating edge tiles can help frame patterns and provide clean transitions between different tile areas.
Installing Tiles around Obstacles
Careful planning is needed when installing tiles around obstacles like pipes or electrical outlets. Use tile cutters or nippers to fit tiles precisely, and apply a small amount of tile adhesive to secure them. Decorative tiles such as mosaics or glass tiles can create attractive borders around obstacles. Use a level to ensure tiles are straight and apply grout to fill gaps for a polished finish.
Installing Skirting Boards
Adding skirting boards is the finishing touch that brings your tiling project together, providing both style and protection for your walls. To achieve a crisp, professional look, it’s essential to install skirting boards so they are perfectly level, using a spirit level and a reliable adhesive will help you get it right. The placement of skirting boards should complement your tile layout and edge tiles, ensuring a seamless transition between the floor and wall. For a dynamic look, consider pairing glossy and matte finishes between your tiles and skirting boards, which can add subtle contrast and visual interest to the room. Thoughtful installation of skirting boards not only enhances the overall appearance of your tiling but also helps protect the lower portion of your walls from everyday wear and tear, making your space both stylish and practical.
Maintaining and Cleaning Tiles
Regular maintenance prevents dirt and grime buildup. Clean tiles with mild detergent and warm water, avoiding abrasive materials that can damage surfaces. Use tile sealant to protect surfaces and make cleaning easier. Stain-resistant epoxy grout is recommended for durability and easy upkeep. Regular care extends the life of your tiles and maintains their aesthetic appeal.
Troubleshooting Common Tile Problems
Even with careful planning, tiling projects can encounter a few common issues, but with the right approach, these can be easily resolved. If you notice excess grout on your newly laid tiles, simply use a damp cloth and a grout float to gently remove it before it sets. Uneven tiles are often the result of an unlevel surface or inconsistent laying techniques; always start with a level concrete floor and lay tiles methodically to maintain a smooth finish. Air bubbles and air pockets beneath tiles can compromise the bond, avoid these by applying tile adhesive evenly and pressing tiles firmly into place as you lay. Regularly check your progress to ensure a professional finish, and don’t hesitate to make adjustments as needed. By addressing these common challenges promptly, you’ll ensure your tiling project looks flawless and stands the test of time.
Tile Design Trends and Inspiration
Tile design is constantly evolving, offering endless inspiration for creating spaces that are both stylish and unique. One of the most exciting trends is mixing tile patterns, textures, and colours to craft a dynamic look that reflects your personal style. For example, pairing large format tiles with smaller tiles can add depth and interest, while mixing natural stone tiles with glass tiles introduces a sophisticated interplay of textures. Neutral tiles and neutral tones remain popular for their ability to create a cohesive look and serve as a versatile backdrop for bolder accent tiles. Experimenting with complementary colours can help you create a striking focal point, whether through a feature wall or a patterned floor. With so many options in tile design, from subtle textures to vibrant hues, you have the freedom to create a space that’s truly your own, one that balances timeless elegance with contemporary flair.
Final Thoughts: Texture Is the New Luxury
True luxury in tile design comes from refinement and sensory experience. Mixing textures with tiles creates layered, tactile, and effortlessly elegant spaces. Whether you prefer organic warmth or sleek minimalism, Roccia’s extensive range of porcelain, ceramic, and natural-effect tiles offers options to balance beauty and practicality. Apply these texture mixing strategies in your next project to achieve a unique, sophisticated result. Visit our Preston or Bolton showrooms to explore textured collections from world-leading brands and let our design experts help you create spaces with true depth and character.