How To Install Large Format Tiles
Written by: Halima Bapu
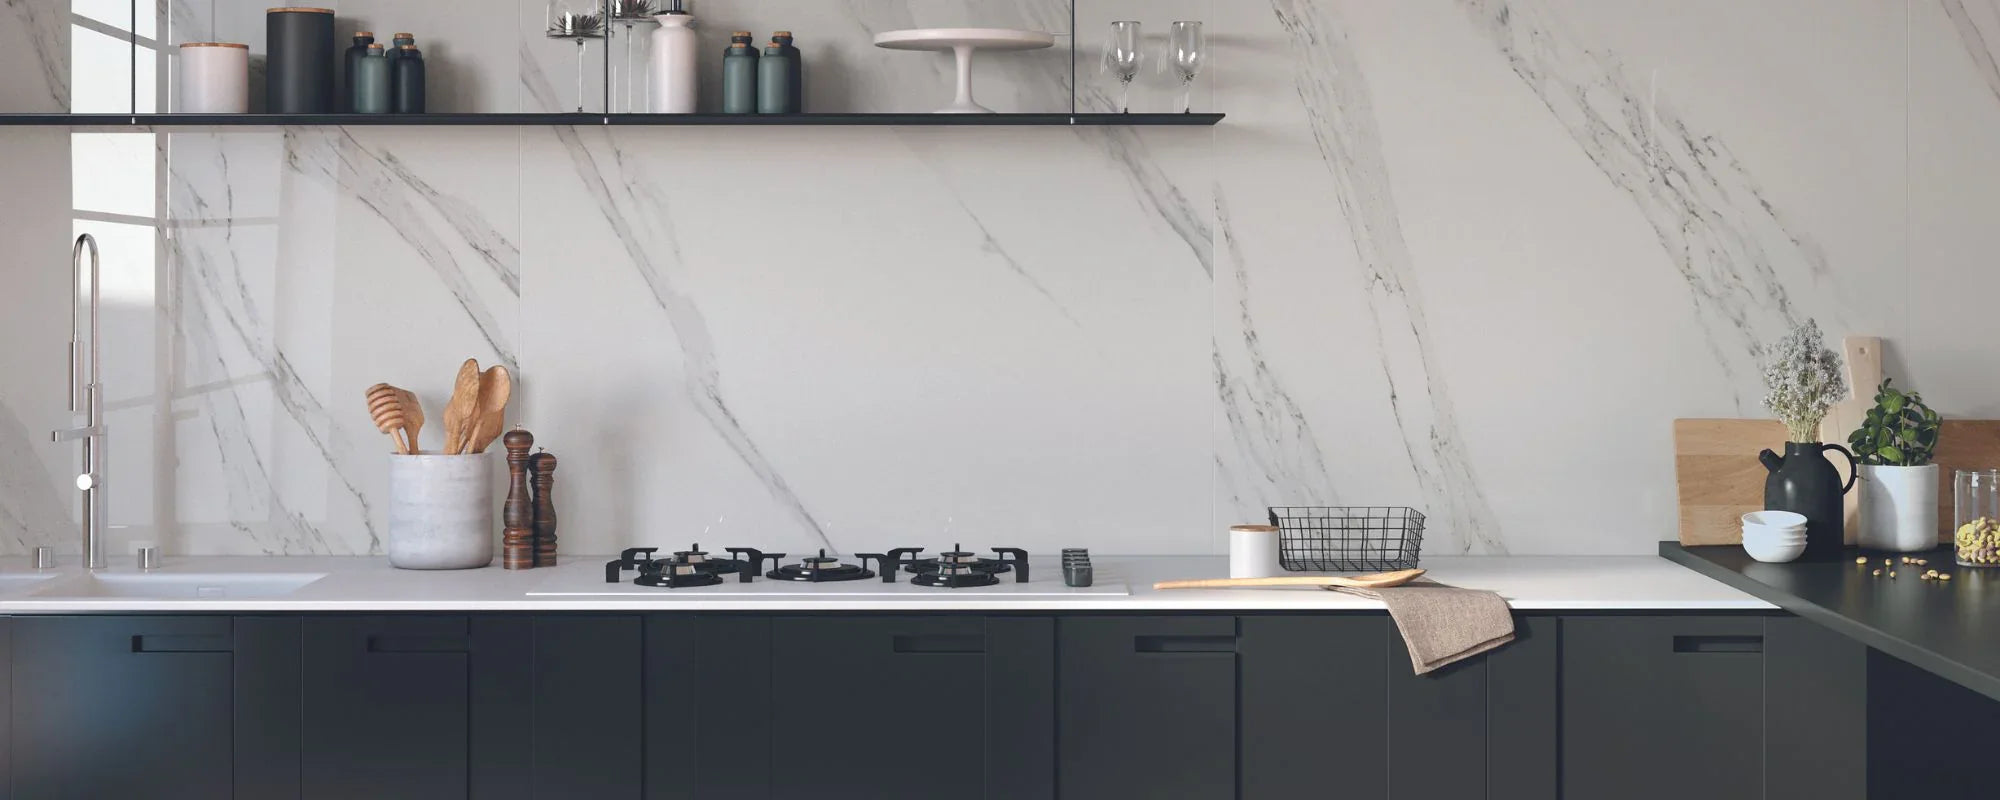
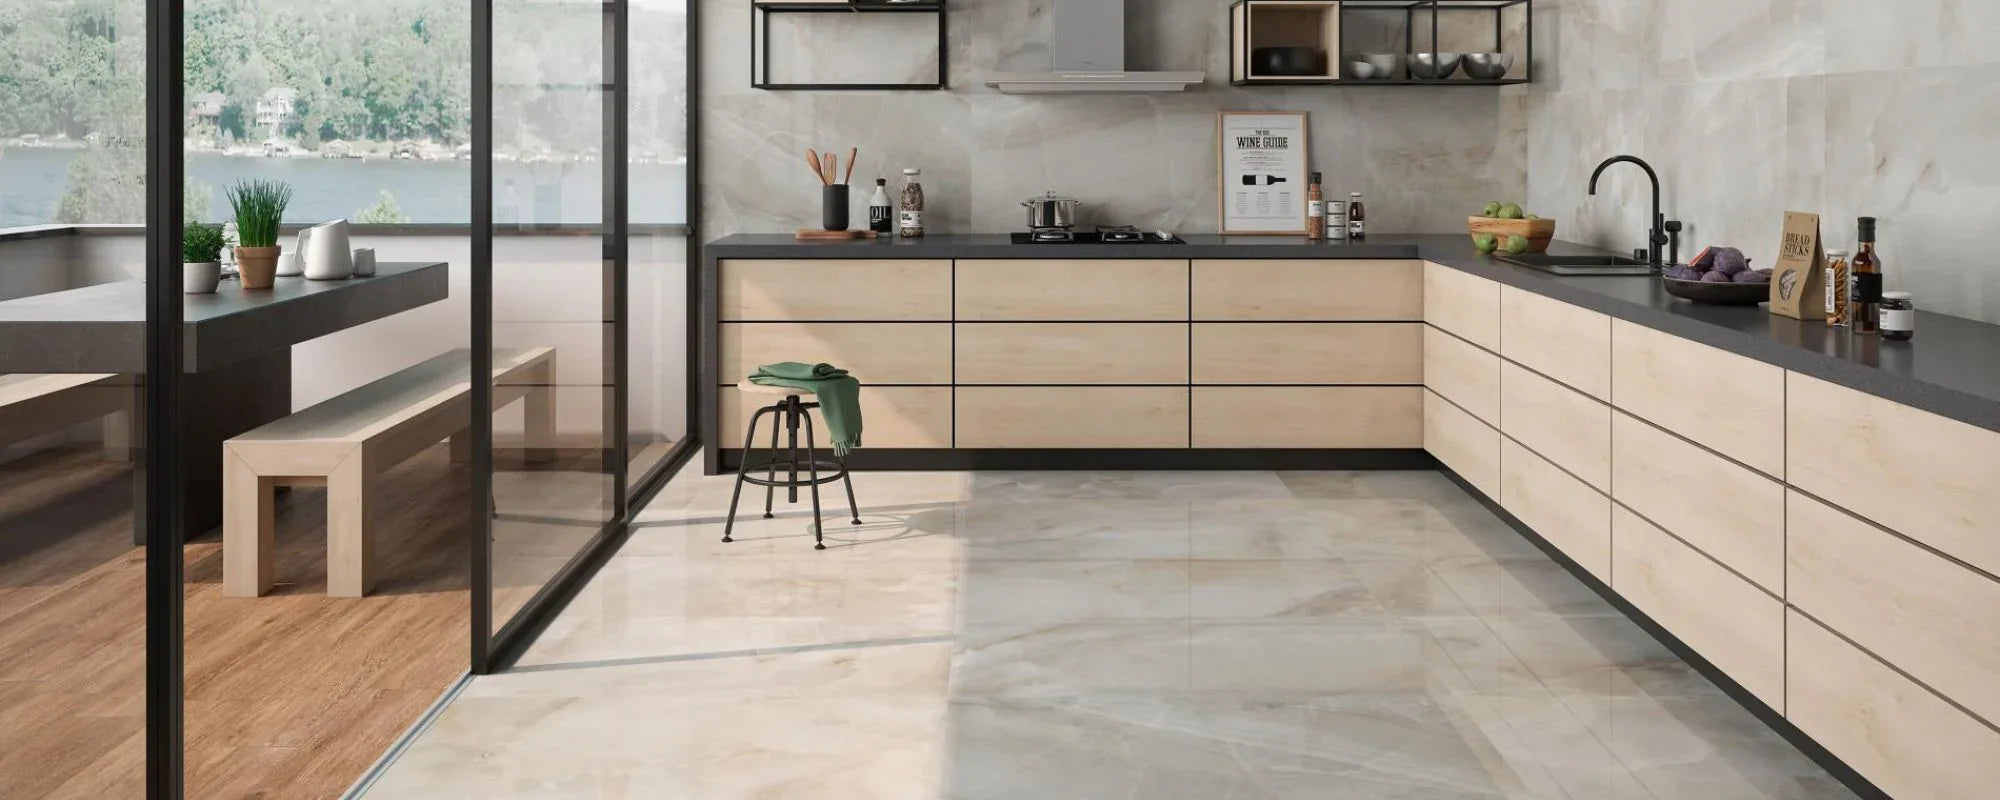
Large format tiles, also known as LFT, are tiles with a side length of 15” or more. Large format porcelain tiles are popular in the tile industry for their durability and stylish look. Although sleek and low maintenance, LFT's need more care and preparation during instillation than regular tiles in order to get the best results.
While harder to install, LFT's offer elegance and saves time. Larger tiles mean less grout to clean, making the upkeep easier. There are many large format tiles available, so choosing a reputable supplier is important for quality materials. This article provides tips and guides you through planning, the equipment needed, and the installation process for these tiles.
Introduction to Large Format Tile Installation
Large format tile installation has become a go-to choice for those seeking a modern, seamless look in their homes or commercial spaces. These tiles, often measuring 24 inches or more, can transform a room with their clean lines and minimal grout joints, creating a sense of spaciousness and luxury. However, installing LFT is a process that demands careful attention to detail. Achieving a perfectly flat surface is essential, as even minor imperfections can become glaringly obvious with larger tiles. The installation process involves not only selecting the right tiles and materials but also ensuring you have the proper tools and a well-prepared surface. Whether you’re updating a bathroom, kitchen, or living area, understanding the basics of LFT instillation will help you achieve a flawless finish that stands the

Planning
When attempting to tile anything, it is important to plan the layout for the floor and wall. Do your research beforehand and figure out what’s possible and what isn’t. Careful planning helps avoid issues during fixing and ensures a simple installation process. If your floor has significant undulations, you may need to reconsider using large format tiles or explore floor levelling solutions before proceeding with your project. If your floors are uneven, it's important to allocate time to evaluate various methods to correct those dips and bumps effectively. Make sure to match the right materials and tools to your specific tile type and layout for a professional finish. Leave plenty of time for planning before you set the date for your tile installation, and ensure the subfloor or substrate on your wall is properly prepared before starting to prevent future problems.
Be sure to check that you have all the equipment. The last thing you want is to be half way through your project before you realise you need additional tools.
Mock-Ups
To begin with, it’s important to create a mock-up of your tile layout to visualise how the finished installation will appear. Mock-ups are especially important when working with large format wall tiles to ensure a visually pleasing and functional design. Mocking up the layout helps visualise the final installation and avoid lippage.
As part of your mock-up, it’s important to also factor in grout lines, as grout occupies additional space between tiles that must be accounted for. Planning for thin grout lines and choosing the appropriate adhesive can make future cleaning much easier.
Avoid Thin Cuts
As part of your planning, you should avoid creating sections with thin cuts—these are narrow slivers of porcelain tile used to fill gaps where full tiles don’t fit. This generally occurs near walls and entrances. When planning your layout, consider the different surfaces, such as wall substrates and floors, to ensure that tiles fit well and to avoid awkward cuts, resulting in a seamless look.
It’s best to avoid thin cuts because they are challenging to cut accurately and can lead to wasted tiles. Besides being difficult to work with, thin cuts are also less visually appealing. Aim for edge porcelain tiles to be at least 25% to 50% of the original tile size for a cleaner and more attractive finish.

Choosing the Right Materials
Selecting the right materials is essential for a successful large format tile installation. Porcelain tiles are ideal due to their strength, durability, and moisture resistance, suitable for walls and floors. Choose tiles, adhesive, and grout that complement your design and are formulated for large format tiles. Using a levelling system, along with suction cups, is highly recommended to ensure even tiles and reduce lippage. Investing in quality materials and equipment sets the stage for a smooth installation and lasting results.
Preparing the Surface
A successful large format tile installation begins with careful surface prep. The substrate must be perfectly smooth, and free from any dust, debris, or moisture. Any unevenness can weaken the bond between tile and adhesive, causing cracking or lippage. Clean the area thoroughly and repair any dips or bumps. Using a levelling system helps achieve the required flatness, ensuring tiles sit flush. Once the surface is clean and level, apply adhesive evenly according to the manufacturer’s instructions. Proper surface prep is key to a smooth, professional installation that lasts.

Equipment
The next step is making sure you are all perfectly equipped to lay your tiles. Having the right equipment is essential for all stages of laying tiles, from prep to final placement. You don’t want to discover that your trowel is missing just as the cement starts to set. Be organised, have your equipment ready and make sure that it’s the right kind of equipment for the specific material you are installing. When handling large format tiles, use suction cups or lifting tools to safely lift and position the tiles during installation.
- Measuring tape (For standard measuring)
- Laser line (Not essential, but can be useful)
- Square Measure (For lining tiles up against wall edges)
- Trowel (For laying the mortar – the bigger the tile, the bigger the notches need to be on your trowel. Select the correct trowel size for your wall substrate to ensure proper adhesive coverage and stability.)
- Wet saw (for cutting tiles in straight lines with ease)
- Continuous rim grinder (for cutting circles or lines in the centre of tiles. When drilling holes in large format tiles, use the right drilling techniques and safety precautions to prevent damage or cracks.)
- Eye protection (For use when cutting porcelain tiles. If you don’t wear eye protection, you run the risk of getting tile chips in your eyes.)
- Cement mix (Choose medium bed mortar specifically made for LFT – choosing the wrong cement will increase the possibility of your tiles cracking.)
- Cement mixer (to churn up the cement, this can be a drum or a paddle mixer.)
- Clips / tile levelling systems (You need a flat surface to use these, and they can cause hollow spots if misused by beginners. Tile levelling systems won’t fix pre-existing issues with the original floor, but they will create a flatter tile lay when used by a professional.)

Installing Your Large Format Tiles
Now that you’ve planned your layout and gathered all the necessary equipment, it’s time to start installing the tiles.
- You will want to start with making your cement. To make cement, you’ll need to combine the mix you’ve brought beforehand with water. The temperature of the water will affect the rate at which the cement begins to stiffen. Mix cement with cold water when possible to give you as long as possible to lay the tile before it sets. If you’re worried about your cement setting too quickly, make the cement in half amounts so that none goes to waste.
- Wait 10 minutes after adding the water and mixing the cement. It needs time to settle. If you add any more water in during this time, or after the cement has set, you will ruin the mix.
- Before you begin, make sure the substrate is stable, flat, and level. A stable surface is essential for proper adhesion and to prevent future issues with your tiles.
- Slap the cement mortar onto your floor and get ready to lay the tiles. Your tiles need at least 80% coverage to be secure, so don’t worry about using lots of mortar quickly. LFT specifically needs a lot of mortar.
- Get out your large notched trowel and smooth out the mortar. Spread it in whichever manner feels most natural to you, but be aware that the grooves all need to be in straight lines before you set your tile to the cement. This will reduce the possibility of your tile cracking in the future.
- Pick up one large format tile. Before you back-butter or lay the tile, check that there are no imperfections, such as packaging stuck to the corners.
- Back-buttering your tiles is a must for LFT. Back-buttering means to cover the back of the tile in cement before you set it against the mortar you have spread on the floor.
- Lay the tile into the mortar. Ensure you achieve full contact between the tile and the adhesive for a solid and durable installation. Push it against the previous row and pull it back to leave room for the grouting later. Gently slide the tile into position to ensure proper alignment and contact with the mortar.
- Have a damp cloth or sponge to hand. Clean mortar spatters off tile tops before the mortar sets. It will be much harder to clean the mortar off the tiles later if it dries to the tile.
- Apply the clips, if you’re using them.
- Carry on spreading the mortar, back-buttering and using your clips.
After grouting, it is important to seal the tiles and grout, especially if you are using a polished porcelain tile or certain grout types, to protect against stains and moisture.